
New Pattern - Traveling Checkerboard

Introducing our newest pattern - the Traveling Checkerboard! The zipper pocket on the back creates convenient checker storage making it easy to take on the go.

I am passionate about encouraging the use of handmade items with kids, especially my own. When they choose a handmade toy or blanket over a store bought one it makes all my hard work seem worth it! So I'm always looking for ways to bring more handmade items into our home, but in a practical, useful sort of way. (Hence the Bucket Tote, the Floor Pouf, you'll notice there's a trend there!) That's where this pattern came from. My kids love to play games, and the classics like checkers never get old. And of course Chess! This game board is ready for it all, and I love the zipper pocket on the back. No more searching for the missing pieces!
Our pattern walks you through the ins and outs of every step, from strip piecing the game board to installing the zipper. You'll have a beautiful checkerboard ready to gift or enjoy with your family in no time!

Here's a run down on the supplies you'll need!
-
1/4 yard of two fabrics for the squares of the game board (small non-directional prints or solids are best)
-
1/4 yard border fabric
-
2/3 yard batting
-
18" plastic zipper
-
2/3 yard backing
-
2/3 yard zipper pocket lining
-
1 yard Shape-Flex Fusible Interfacing
-
Fabric Glue Stick

Have you ever had trouble keeping your fabric lined up when you install a zipper? It happens because the fabric is stretching and the zipper isn't, which makes for long crazy tails of fabric and a wavy zipper. Well no more! I've found some tips to help you. First, applying a fusible interfacing will help stabilize the fabric. On the Traveling Checkerboard pattern this also acts as stability to the game board. If you would prefer to not have the added stiffness on your project, you could cut the interfacing into small strips and only apply it in the seam allowance. Another trick I used to ensure proper zipper installation was to baste it in place with a fabric glue stick. Between the interfacing and the glue I only needed a couple of wonder clips to keep things in place as I sewed them!

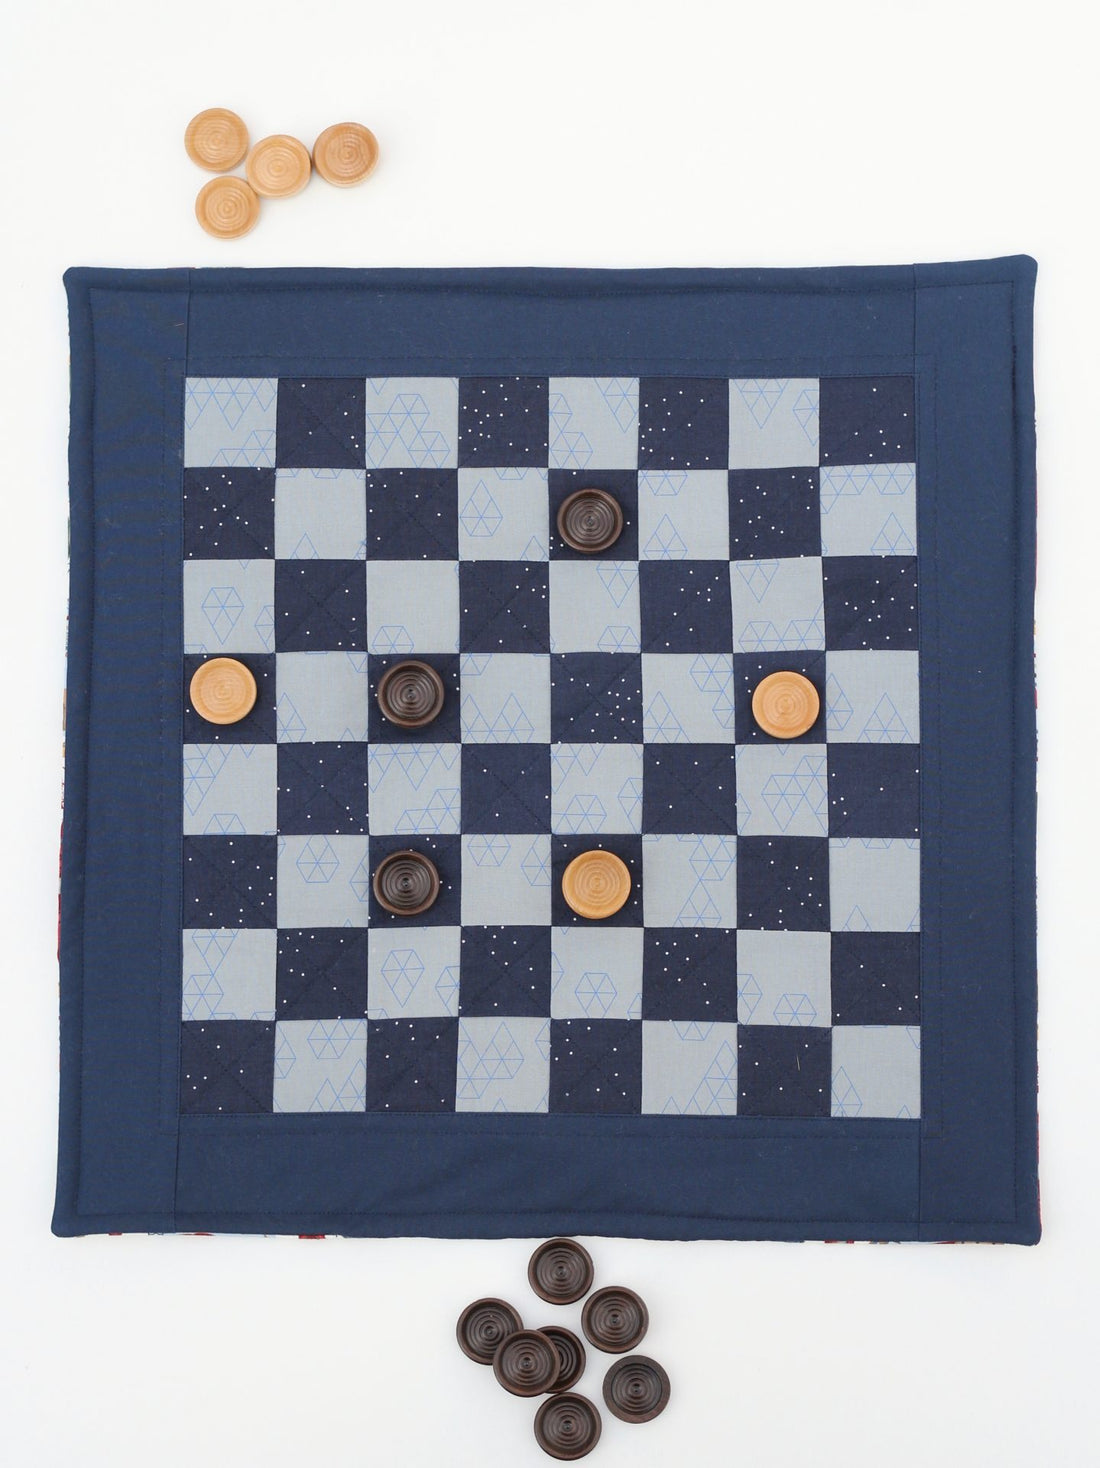
Notice those beautiful wooden checkers? Well we couldn't have you all making checkerboards without finding you the perfect checkers to go with them! We've found these amazing two toned wooden checkers that nest perfectly on top of each other so you can collect all the kings! They are packaged in sets of 24, 12 of each color, ready to be gifted or enjoyed with your new Traveling Checkerboard. You can find them in the shop or online right here. We are excited to include this on our gift making list for the holidays this year! It's so much fun to pick just the fabric for each game loving person on your list. And wouldn't it make a great gift for a teacher's classroom?
We know you believe in handmade as much as we do, that's why we love you so much! We hope you have a blast making the Traveling Checkerboard and sharing it with the people you care about.
Here's the fabric details on the game boards pictured!
Squirrel Checkerboard:
Add it up in Bananas
Netorious in Filler Paper
Essex in Steel
Squirrels in Yellow
Hot Pink 18" zipper
Camping Checkerboard:
Sprinkles in Counting Stars
Geo Drops in Denim
Bella Solids Navy
River Journey in Tool
Brown 18" zipper
Happy Sewing!
Roxanne

UPDATED 2/22/19: New Checkerboard Kits are on the Shelf!
This project was such a fun one! I can't wait to use it this summer while out camping or even on the deck.

Sew you wanna know how much time it's going to take?
About 2-3 hours for the full project

Will luck be on your side? This horseshoe print is fun for the back of the checkerboard.
Finished Size: Approximately 19"x 19"
I kept it simple with the quilting of the checkerboard, just doing a back and forth following the parallel seam lines of the checkerboard.

Tips to avoid the dreaded seam ripper:
-Take the time to press the playing top, before adding the boarder pieces.
-Be sure to PRESS and not Iron - ironing can distort the overall dimensions of the checkerboard. If your a perfectionist, the finished project will bother you until the end of time :)
-Definitely use interfacing for the backing and the zipper pouch. It adds stability to the overall zipper pocket and to the checkerboard.
Check out the the Traveling Checkerboard Pattern - HERE!
You can also make this exact checkerboard with this kit - HERE!
Grab wooden checkerboard pieces - HERE!


